To add extra protection to your work, you can add a personalized watermark to your photos. Please note that the watermark is for digital protection only and will not be included in any printed photo product or added to any downloadable files.
First you need to decide what your watermark will be. To do this, go to the Sales Panel and click on Watermark. You will find different options.
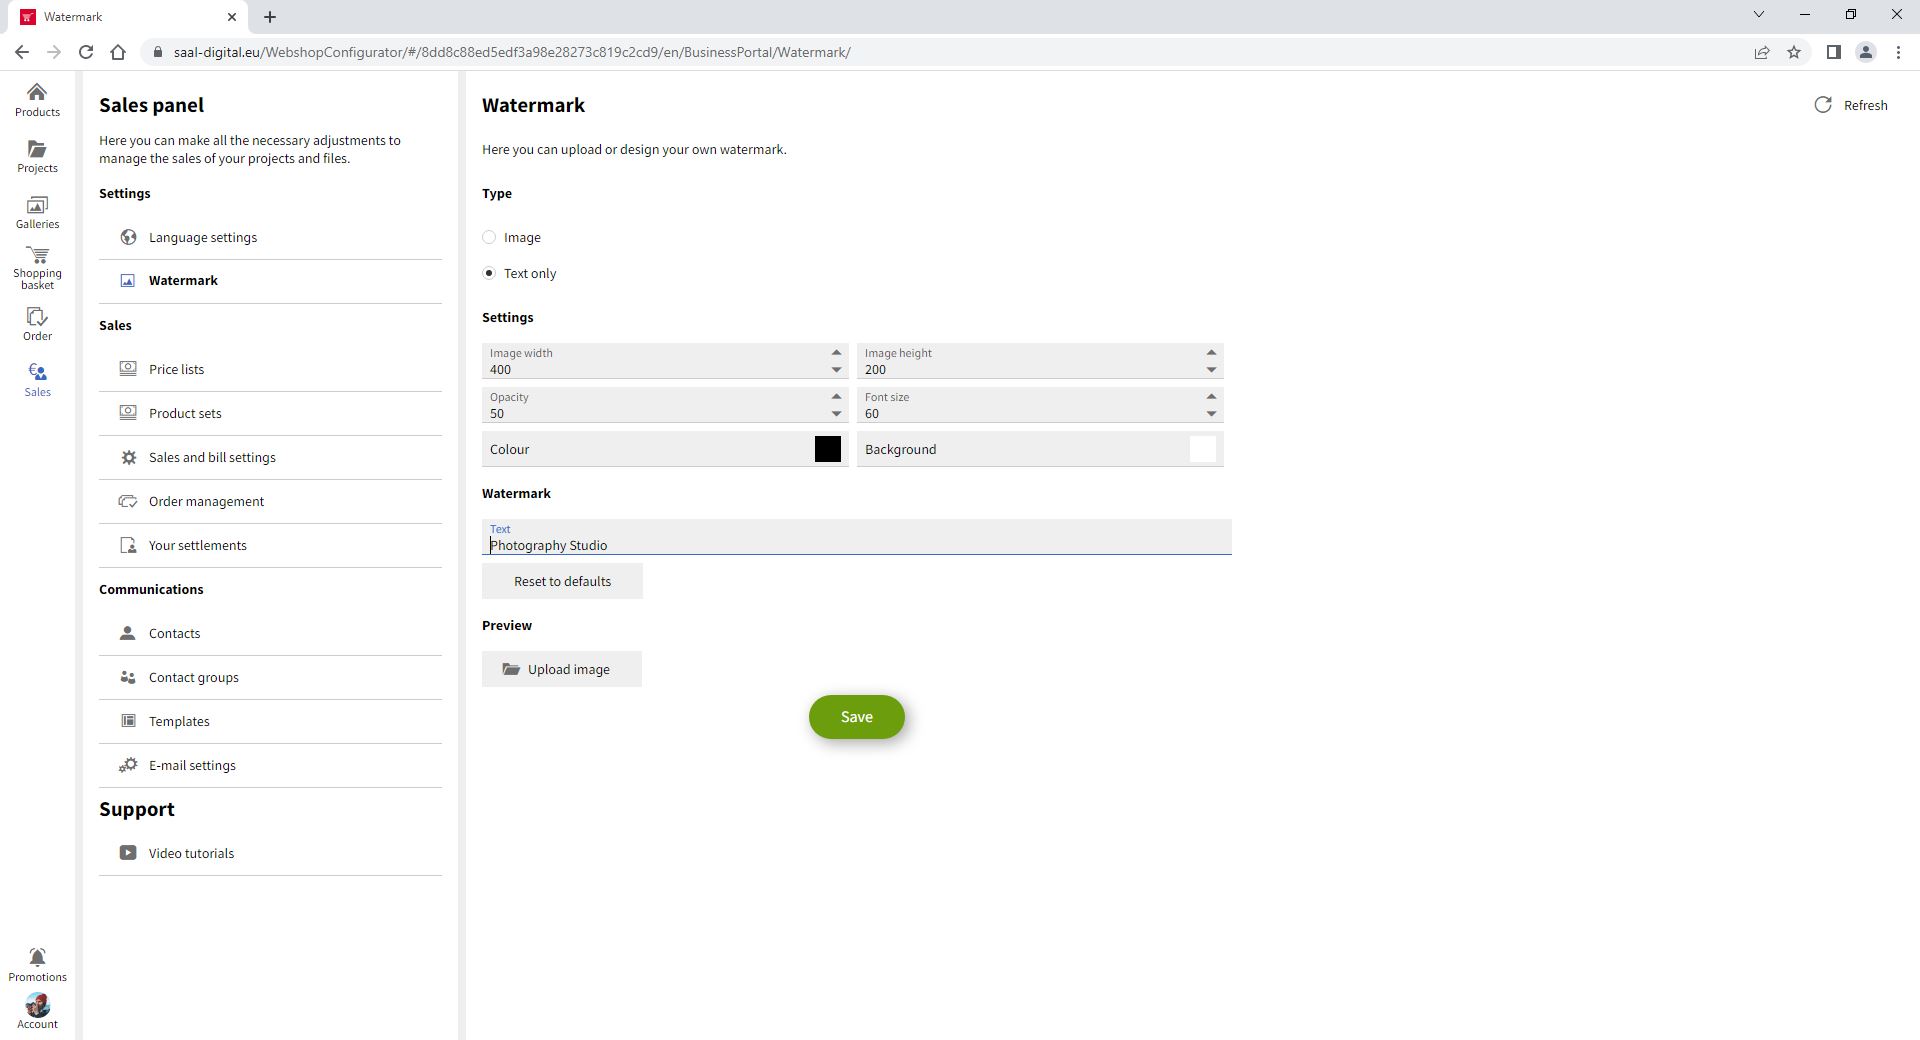
You can choose to have your watermark as text. This text will be displayed in a grid of the specified sizes. You can also vary the opacity, font size and even the colours if you wish.
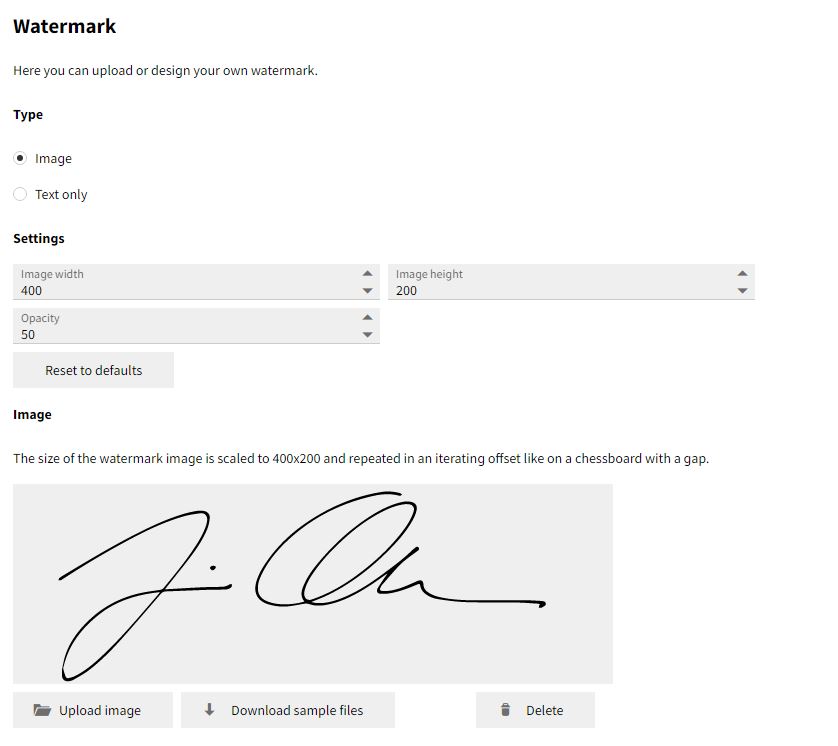
Or you can choose to have your watermark as an image. You need to select Image under Type. And the option to upload an image as your watermark will appear. This image will be repeated as a chessboard according to the settings you have set. You need to click on Upload image and select the image you want to use as your watermark. The uploaded image will appear in this panel.
You can preview how the watermark will look on your photos. You need to click Upload image under Preview and select a photo to test the watermark on.
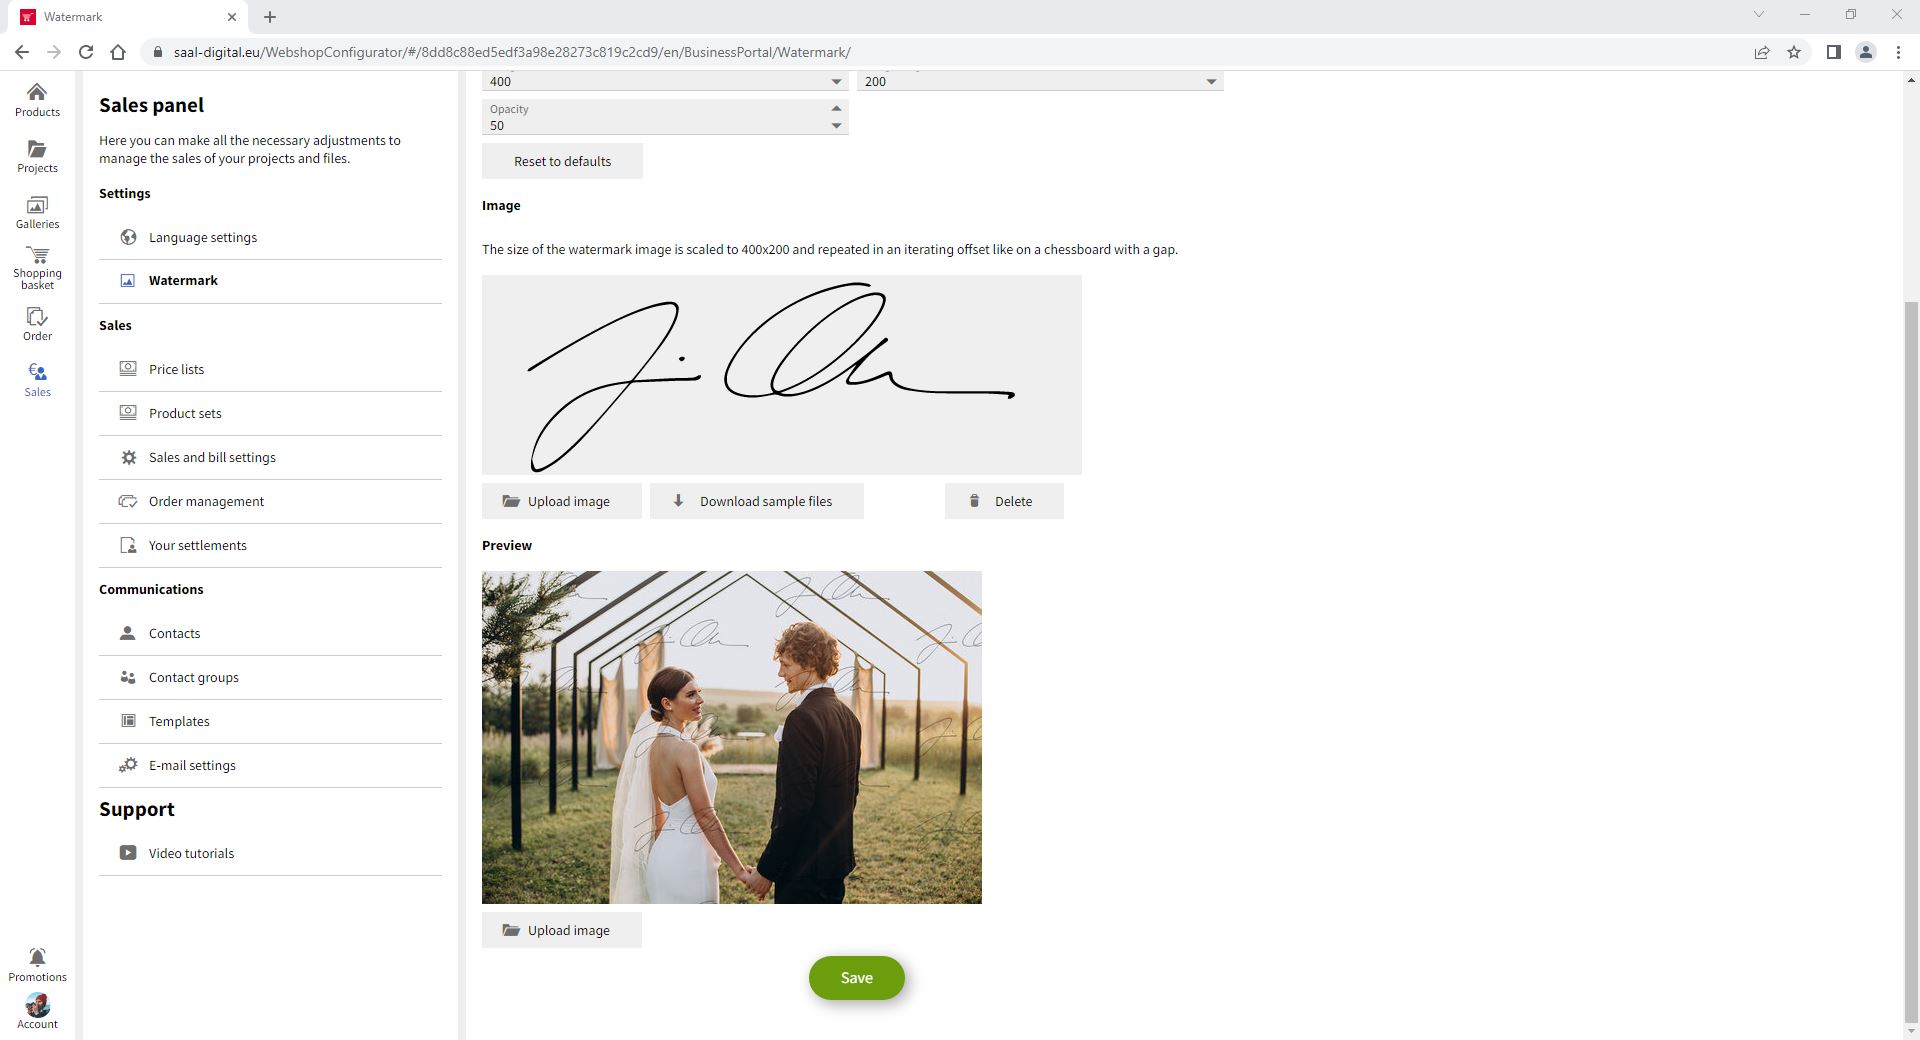
When you are satisfied with the result, click Save.
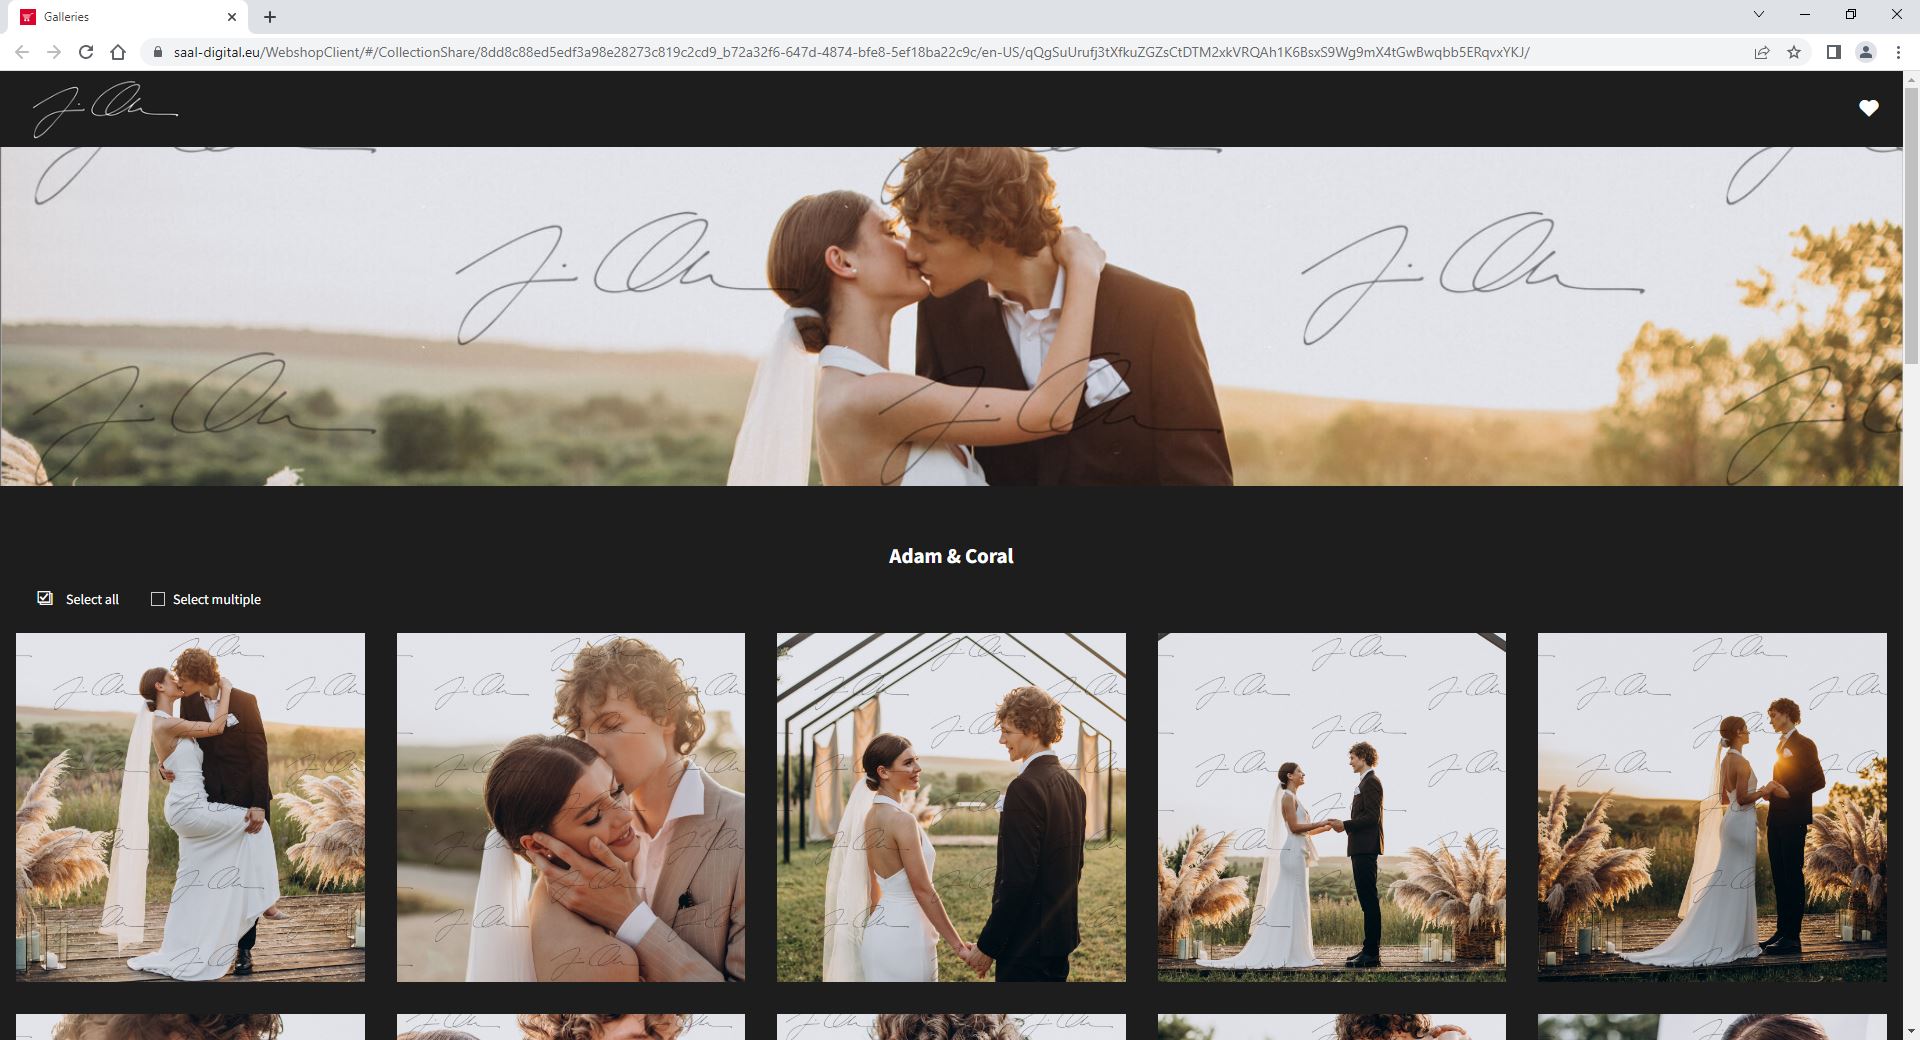
To apply the watermark to a gallery, go to the Galleries panel. Here you will need to open the Gallery settings of the gallery to which you wish to apply the watermark. Many options will appear, you need to activate the watermark and click on Save.
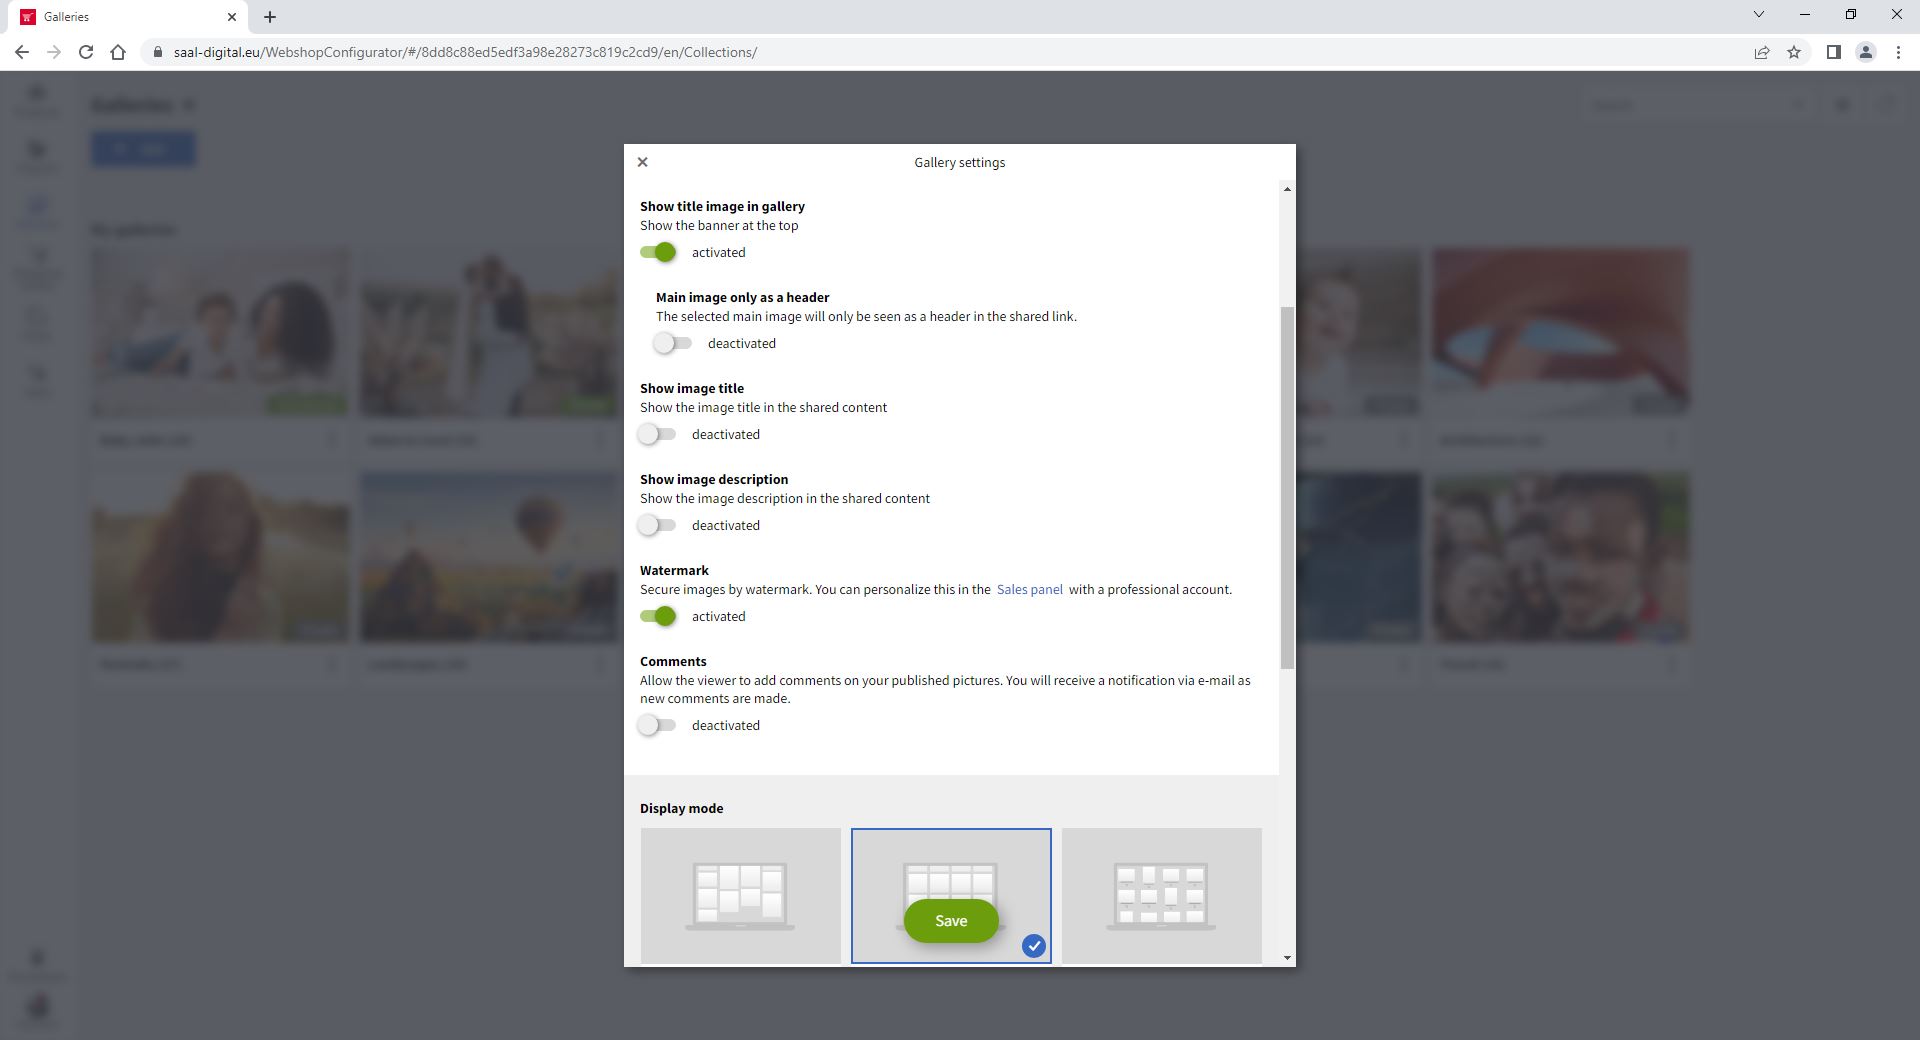
If you open your gallery, you will see that the watermark has been applied. You can deactivate the watermark at any time. Please note that it may take a few minutes for the watermark changes to be applied to all images in the gallery, whether you choose to activate or deactivate the watermark.
To apply the watermark to a project, go to the Projects panel and open the Project settings of the project to which you want to apply the watermark. Many options will appear, you need to open the Show advanced settings, activate the watermark and click Save.
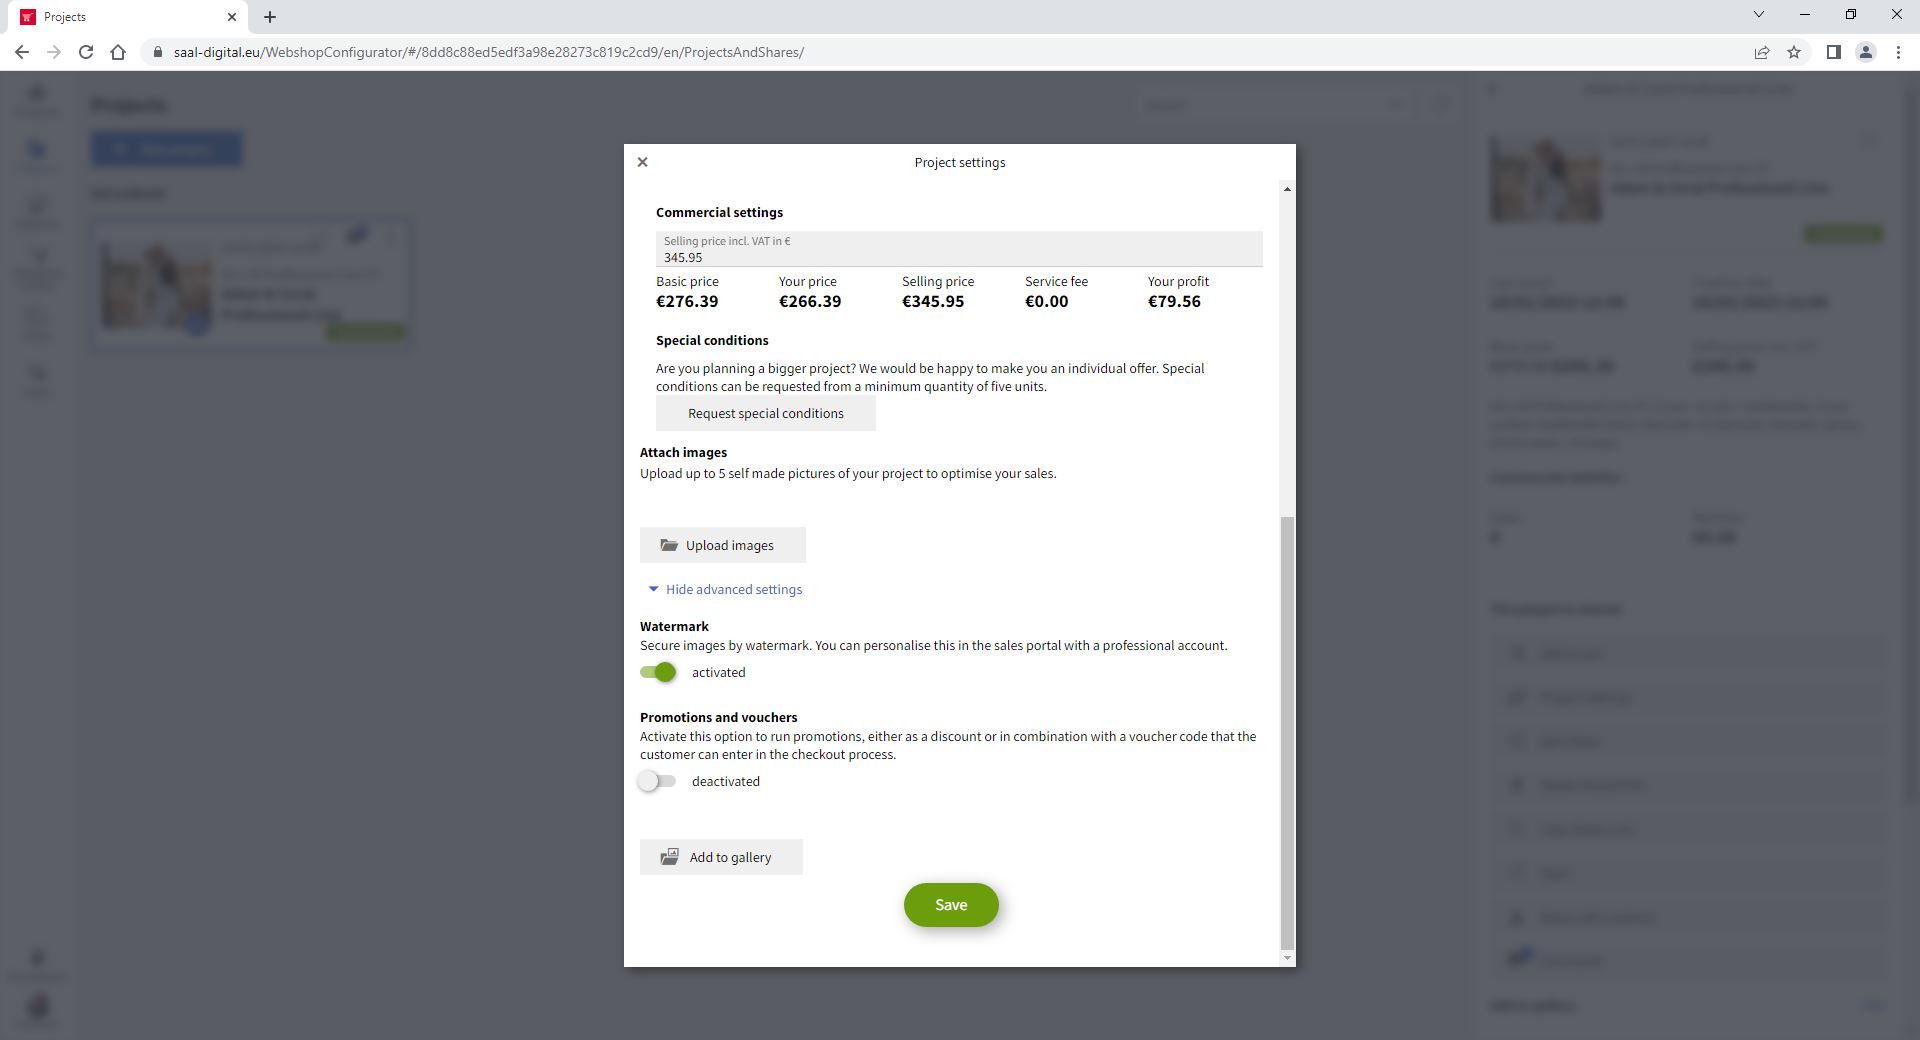
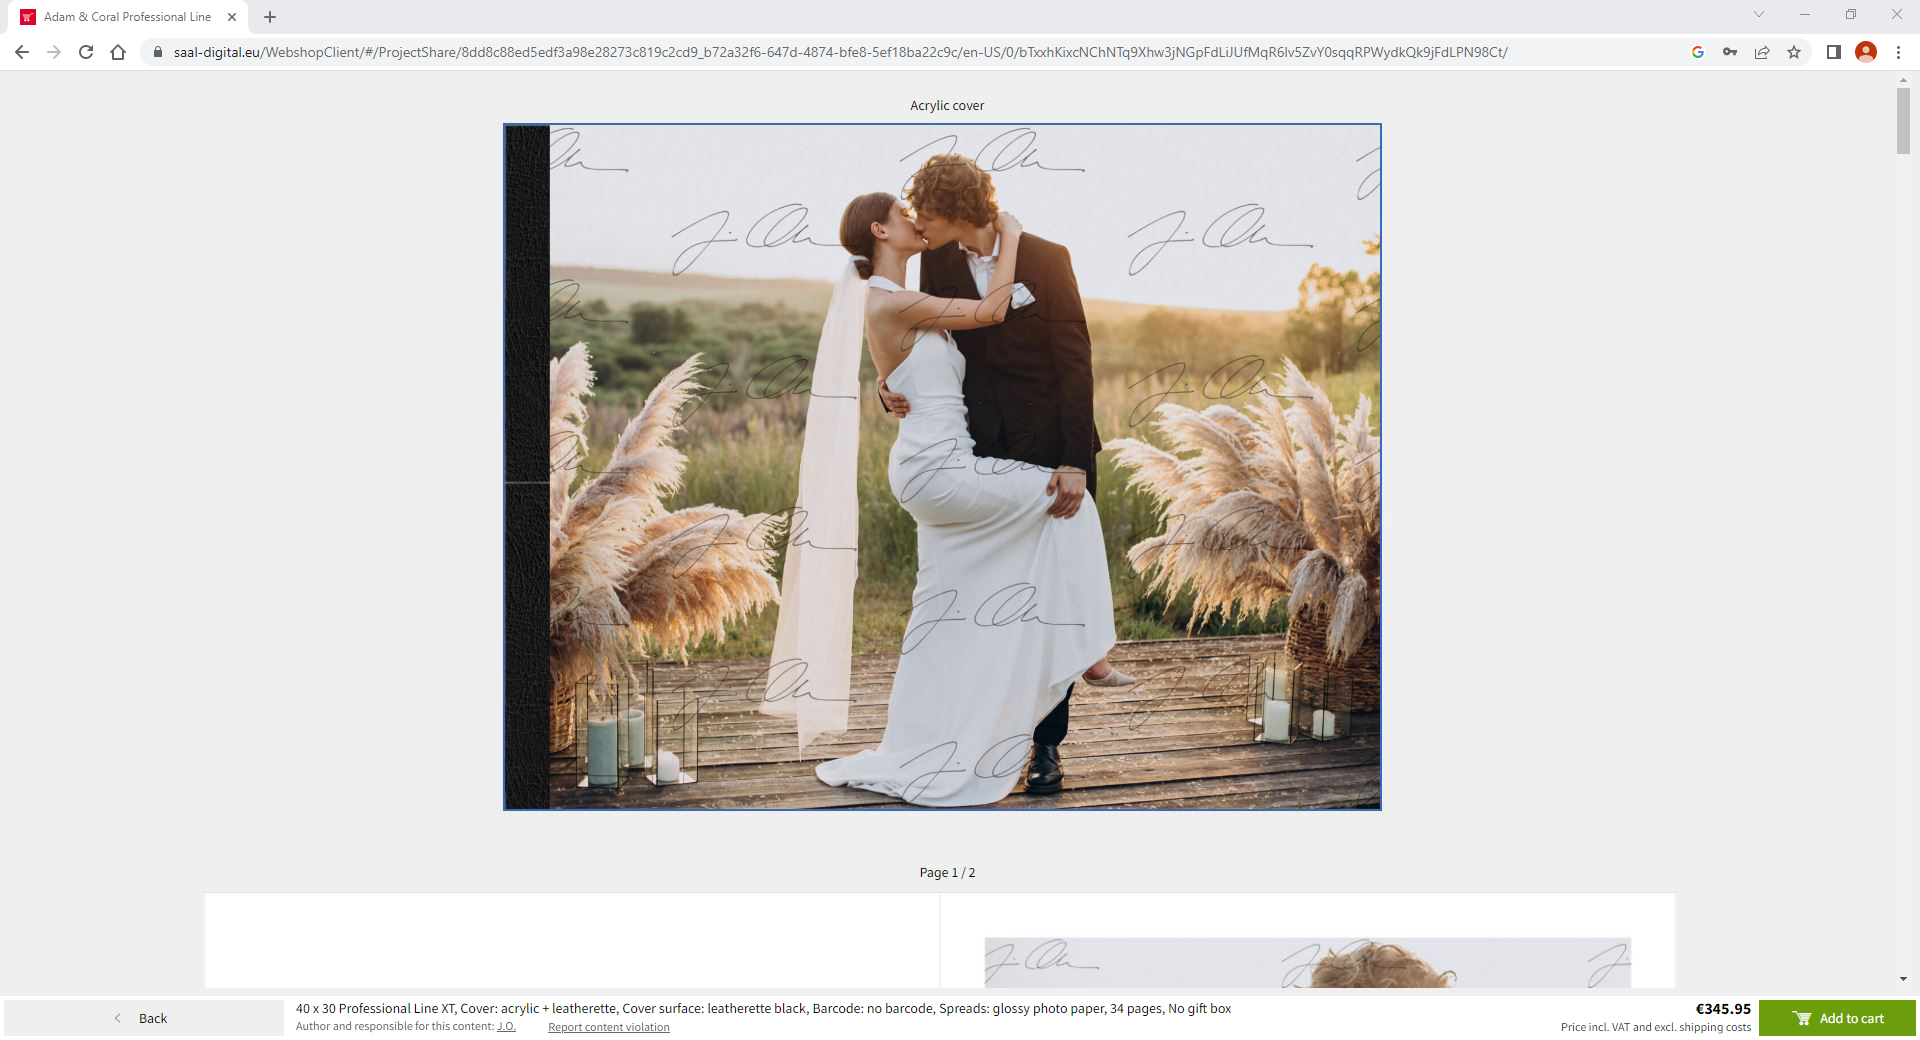
If you open your project, you will see that the watermark has been applied.
To apply a watermark to a Photo Job, activate this option within the Photo job settings on the Style and appearance tab. For more information, see thePhoto Job - General Menu article.

Get exclusive discounts and designing tips! By signing up, you acknowledge our Privacy Policy. You can unsubscribe at any moment.


